Growing up, one of my most favorite treats to have were Rice Krispies treats. I remember, shortly after my husband and I got married and moved into our first house, I got the idea to make some fresh Rice Krispies treats for when he came home from work. Sounded easy enough. I mean it’s three ingredients…what could go wrong? Well, for my cooking/baking ability at that time, everything could go wrong! They turned out rock hard and not the tasty treats I remembered as a kid. I swore off making them and haven’t tried until this past weekend. After all, they are the best Easter treats, in my opinion!
*This is a partnered post for the Rice Krispies brand
Easter Treats
Last Sunday we had dinner with my husbands family for Palm Sunday. I decided that the kids and I would make a fun, Easter themed dessert…Rice Krispies treats. Rather than go from memory (which proved to not be all that well the last time I tried to make these treats), I decided to look around that the Rice Krispies Pinterest page, not only to find great ideas on what we could make, but to also learn how to make them…correctly! My kids instantly saw these Rice Krispies Easter Egg shaped treats and wanted to make those! So we did!
Making Rice Krispies Treats
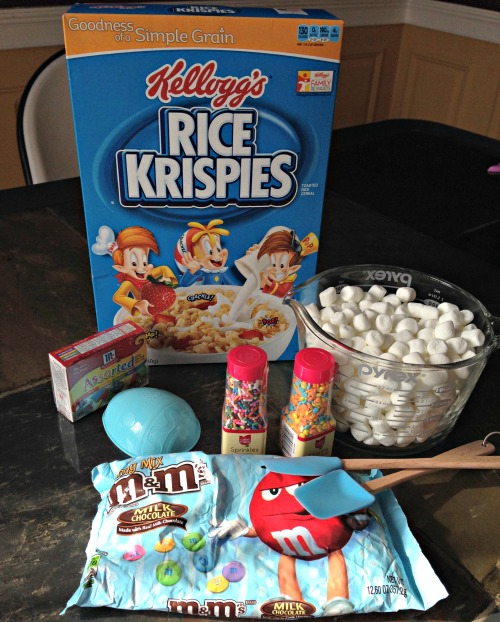
To make the Rice Krispies treats, all you need is:
- 3 TBS butter
- 4 cups mini marshmallows
- 6 cups Rice Krispies cereal
It’s been 12 years since I made Rice Krispies treats and I was able to tell within 20 seconds of starting this batch, what I did then to mess them up. I had the temperature too high. The directions say to melt the butter and marshmallows over LOW heat. Back then I didn’t enjoy cooking or baking so I had the “turn the heat up higher so you get done faster” mentality. Now I know the importance of following the directions!
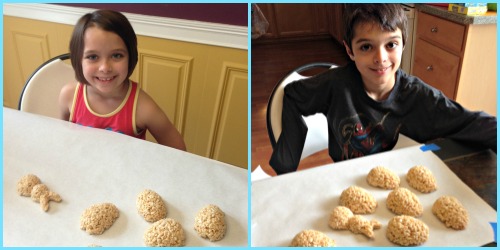
Now it was time for the kids to join me! Bella was very excited to make these, Zachary…he just wanted to eat them!
So…How Did We Make Them?
- Step 1: Make the Rice Krispies treats. While they are still warm, form them into your desired shape. For this we used an egg shaped mold (shown in the picture at the top).
- Step 2: Once the treats have slightly cooled, put a thin layer of frosting on it so your decorations will stick. The kids tried to do this step, but they either put WAY too much frosting on or they squeezed the egg so hard, it was no longer an egg. So we helped them out a bit.
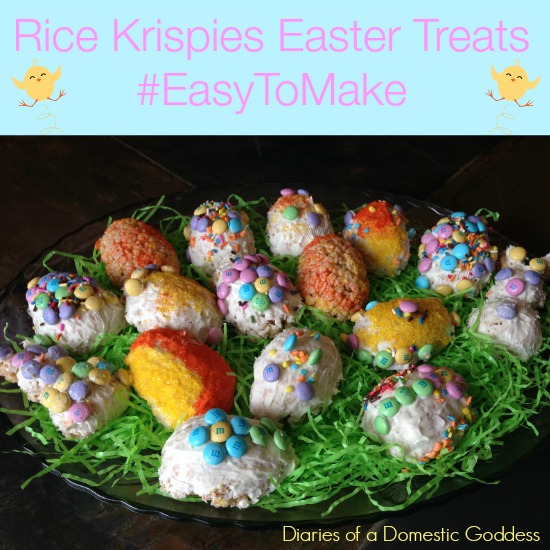
- Step 3: Decorate however you choose. We used sprinkles and M&M’s. Bella liked to try and make a patter…Zachary liked to get as much as possible on the egg. If you just want to stick sugar on the egg, you do not need to use frosting, just roll the egg in the colored sugar!
Here is our finished product, 100% decorated by my seven and nine year old:
This was a pretty fun activity for the kids. It took around an hour to do and they were VERY proud of their dessert that they were able to take to dinner. I asked them to rate their dessert on a scale from 1 to 10 on the looks, taste and how fun the activity was. Here is what Bella had to say:
“Well, it was fun once we got to start decorating it. So I say 10 for that. They taste super good, so that’s another 10. For looks I say 7. I mean you can tell a kid did it, but they aren’t perfect so they shouldn’t get a 10, but I’m also only 7 so I’m going to give them a 7”
Easter’s this weekend. Visit RiceKrispies.com to get inspired with new recipe ideas and make something to take to your brunch or dinner! While you’re there, check out how you can enter the Rice Krispies treat-making contest on Pinterest!


Super cute!! Love Bella’s reasoning! 🙂
That’s Bella for you! She always has a reason for everything!