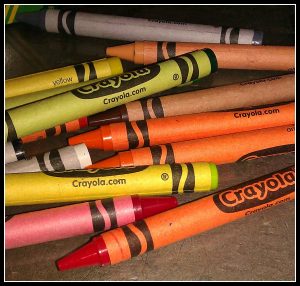
Since Dan has been out of work he’s gotten a lot of projects around our house done. Mainly the kids bathroom that has been under construction for 7 years. Yes you read that correctly…7 years. In fact, my daughter (who’s 5 years old) just found out last year what was on the other side of the door in the hallway upstairs. I can still remember the look on her face when she realized we had a tub in that room! So while Dan has been working on that bathroom, Bella has been spending quite a bit of time at my parents house. While there, she’s been working on special projects for everyone for Christmas. We didn’t want her to feel left out on Christmas morning, so while she was at the ballet with my mom yesterday, we took Zachary to get some supplies to make Bella a homemade Christmas present.
Zachary decided to make Bella her very own crayons. He knows how much she likes to color and in his mind, the idea of being allowed to break the crayons, made this the best present ever! To make your own crayons, here are the things you need:
- Crayons
- Silicone molds
- Super fine glitter
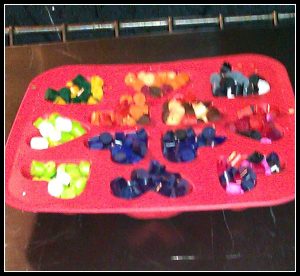
The first thing we did was head to IKEA. They have all kinds of silicone ice cube trays that we thought would work great as crayon molds. Zachary picked out hearts, ninja stars, fish, and flowers. Next we headed to Walmart. I had crayons at home, but I wanted to get a few extra boxes just in case we needed more. Once we got home, we started to peel the paper off. We quickly found that if we took a knife and ran it down the crayon, the paper came off much easier than trying just peel it. Also, did you know, and this could be total coincidence, but every orange crayon we took the paper off of had extra glue on it, gluing the paper to the crayon. No other color had that. Weird.
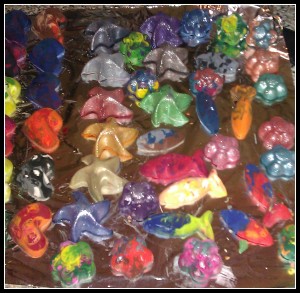
Aren’t they cute?!? My favorite are the flowers and the ninja stars (as my son calls them). I also like the glitter crayons better than the ones we did not add glitter too. Bella is going to be beside herself! If you do this, I recommend not doing the fish. While they are super cute, they were very difficult to get out of the mold. If you look closely, you’ll see quite a few fish without tails!


What a fun idea!! I have never done anything like that but it seems so easy that it would make for a nice craft to do with my nephew and then let him take them home with him!
I love that you used molds that were shaped. I have made these using my muffin tin and the kids thought they were awesome!
Did you do anything special with the muffin tins? Like spray them or anything with cooking spray? I was just afraid they would ruin my muffin tins.
I’ve used muffin tins before (http://www.smallstepsonourjourney.com/2011/09/making-homemade-crayons.html) but also muffin cups – I wouldn’t do it in the little paper cups again.
First of all, let me say that I hear you on the long bathroom renovations! Ours took about 3 years. Second, I love your crayons!! Those are SO cute! I’ve never made my own before but it’s a great idea – when I was little I did a lot of crafts for Christmas presents.
my favorites are the stars, they look like starfish to me 🙂 cute for gifts for little toddler fingers.
You inspired me! Alas, we have no Ikea on this side of the state, and I wasn’t up for a drive to Canton or Chicago. So I ordered some Lego brick shaped ice cube trays from amazon and then bought some squarish ones from Meijer. Heating up the oven right now to melt them. My nephews and boys are going to love these!!!!!!!!
Awesome!!! I can’t wait to see them…please post a picture on facebook!
I found mine at the $1 bin at target around Valentines Day. They are heart shaped. They worked.
What a great idea! I need to do this with our very well used crayons.
It’s really fun! I want to make some more with the kids!
Wow, what a wonderful idea! I’ll keep that one in mind – I’m sure she loved it.
I write about DIY homemaking too, and it you like you can check it out at Patchwork Radicals
Take care, love the blog!
I did this for my kids birthday party as a goody bag filler. Lots of fun and work, the kids LOVED peeling and sorting. I found out that the real cheap crayons did not melt evenly. Also make sure you melt the colors light to dark or you will have dark specks in the lighter colors.
Did you use washable crayons? We made these with washable crayons. I baked them 20 min, cooled 20 in fridge, and cooled 10 in freezer. Now that they are coloring with them they are rubbing off on their hands and clothes. Wondering if it is because I used the Crayola “Washable” Crayons? Or if they sit overnight are they less likely to rub off on hands/clothes.
Should I have used a generic off brand crayon, should I have not used the washable ones, or do they just need to sit a little longer. Just wondering for next time.
Either way thanks for the step by step instructions. I was a little worried about putting the silicone ice cube tray in the oven. It was reassuring to see you do it. Great use of all the little broken crayon pieces too!
I did not use washable crayons. I’ve actually never heard of them!
I used a mix of different brands, but a friend of mine made them and used only crayola (she says they work best) and she uses metal tins (I believe she lightly sprays them).
When my daughter uses the crayons they do not rub off on her. So I’m thinking it is the washable crayons.
Glad you made them!