About two weeks ago I told you about the AWESOME Babycakes Cake Pop Maker

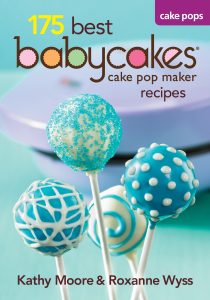
The first recipe I want to try is called, Welcome Spring. See the recipe and picture below…I’m sure mine won’t look as great, but I bet it will taste good!!
Welcome Spring
Makes one centerpiece
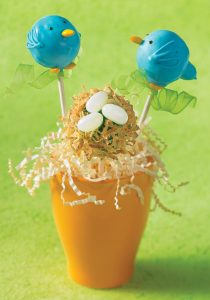
Welcome spring in grand style. Whatever the event — a shower, a garden party, Easter dinner — this center piece of cheerful bluebirds will set the scene for spring.
Ingredients:
- Blue, green, and dark chocolate candy melts
- 3 cake pops (any flavor)
- 6 yellow candy and chocolate covered sunflower seeds
- Paramount Crystals or Shortening
- 3 white jelly beans
- Toasted flaked coconut
Materials:
- 3 cake pop sticks
- 1 pastry bag or squeeze bottle fitted with a fine tip
- Fine paintbrush
- 1 small decorative flowerpot
- Styrofoam block (at least 2 inches)
- Green paper shred
- 12inches of green tulle (about 6 inches wide), cut into 4 inches lengths
Directions:
- Melt 1/4 cup blue candy melts and use to attach sticks to 2 cake popsl. Freeze cake pops for at least 15 minutes to set. Reserve the remaining candy melts. Repeat with 2 TBS green candy melts, attaching a stick to the remaining cake pop.
- Add 1/2 cup blue candy metls to those left in the cup and melt until smooth. Coat one of the cake pops secured with blue candy melts. Immediately hold the stick horizontally so that the melted liquid flows down to one spot on the cake pop to create the tail. Stick a sunflower seed on the front of the cake pop to make the beak. Stick two seads on the bottom to make feet. Set in a cake pop stand to dry.
- Reheat blue candy melts, adding more as needed. Use the pastry bag to pipe wings on the sides of the birds. Set in the stand to dry.
- Melt 2 TBS chocolate candy melts, using Paramount Crystals or shortening to thin them. Use the paintbrush to paint dots for eyes. Set in the stand to dry.
- Add 1/2 cup green candy melts to those left in the cup and melt until smooth. Coat the remaining cake pop. Immediately nestle jelly beans on top for the eggs, then pile coconut around the jelly beans to make a nest. Set in the stand to dry.
- Measure the dimensions of the flowerpot and trim the styrofoam to fit snugly abnd be 1 inch shorter than the pot. Place styrofoam, arranging in the pot and cover with paper towel shred.
- Tie a length of tulle in a knot around each cake pop stick. Slide knots up to just below cake pops. Plus the cake pop sticks into the styrofoam, arranging the birds behind and slightly higher than the nest.
TIPS: For yellow birds, substitute yellow candy melts for blue. Use orange candy and chocolate covered sunflower seeds for the beak and feet.
Tips x2: When you’re coating cake pops, the candy melts need to be deep enough that you can dip the cake pops straight down into the melts. If you’re only dipping a few cake pops, there will! some candy melts left over, but they can be melted again and used another time.
Excerpted from 175 Best Cake Pops Recipes by Kathy Moore and Roxanne Wyss © 2012 Robert Rose Inc. www.robertrose.ca Reprinted with permission. All rights reserved.
Aww, these are so cute and perfect for spring!
Those are so cute!!